
So guys this is the other Diy planter which I wanted to share with you guys so I hope you all like it…..
Things you will need:
- big plastic bottle
- knife, scissor
- brush
- paint
- lady finger

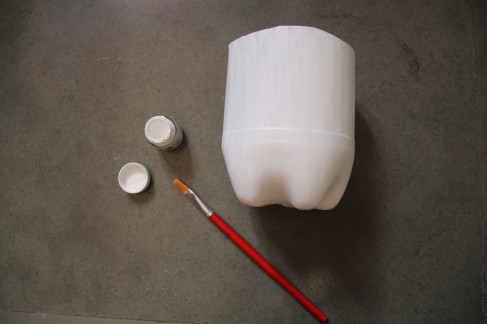
First step:
take your bottle and cut it using knife and a scissor , as shown in the below picture.

Second Step:
now take white colour and paint the bottle. Here I have used acrylic paint you can use any type of paint just avoid using water colour as the colour can start coming out when you water your plant. after colouring the bottle let it dry you can colour it one more time if you see some patches .
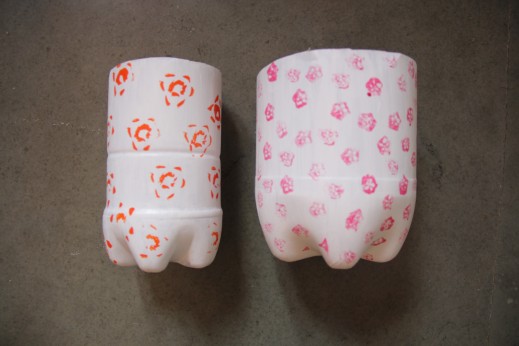
Third step:
cut the tip of the lady finger , dip it in the colour of your choice and start making design on the bottle. here I have used pink colour

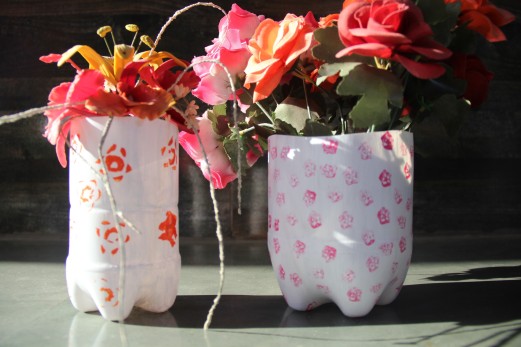
this is how it looks when its finally done…for the other planter I have used the green stick of a eggplant you can try using different vegetables or fruits
Try this diy and let me what you all think about it….


Creative idea. It adds up to my innovation list. Thanking you for that. Fabulously innovative blog. Keep posting.
LikeLiked by 1 person
Thanks for your support…. I am glad you liked it
LikeLiked by 2 people
I’ll keep supporting in the future is well.
LikeLiked by 1 person
Thank you .. means a lot
LikeLike
Hello ! I must you have a creative mind ! 😀 keep doing it ! 🙂
LikeLiked by 1 person
Hello ! I must say you have a creative mind ! 😀 keep doing it ! 🙂
LikeLiked by 1 person
Thanks a lot …😊
LikeLiked by 1 person
Where are you from ?
LikeLiked by 1 person
India
LikeLiked by 1 person
Great ! 🙂
LikeLike
OMG, the plastic bottle planters are super cute!!! ❤❤❤
LikeLiked by 1 person
Yayaya… they are cutest 😉
LikeLiked by 1 person
Nomination for you! check it out – https://aestheticgraphy.wordpress.com/2017/04/09/the-blogger-recognition-award/
LikeLike
This is really pretty😍😍😍😍
LikeLike